Category: Stories

  • Music Production Tips: Treat Compressors Like Your Mother

    Music Production Tips: Treat Compressors Like Your Mother

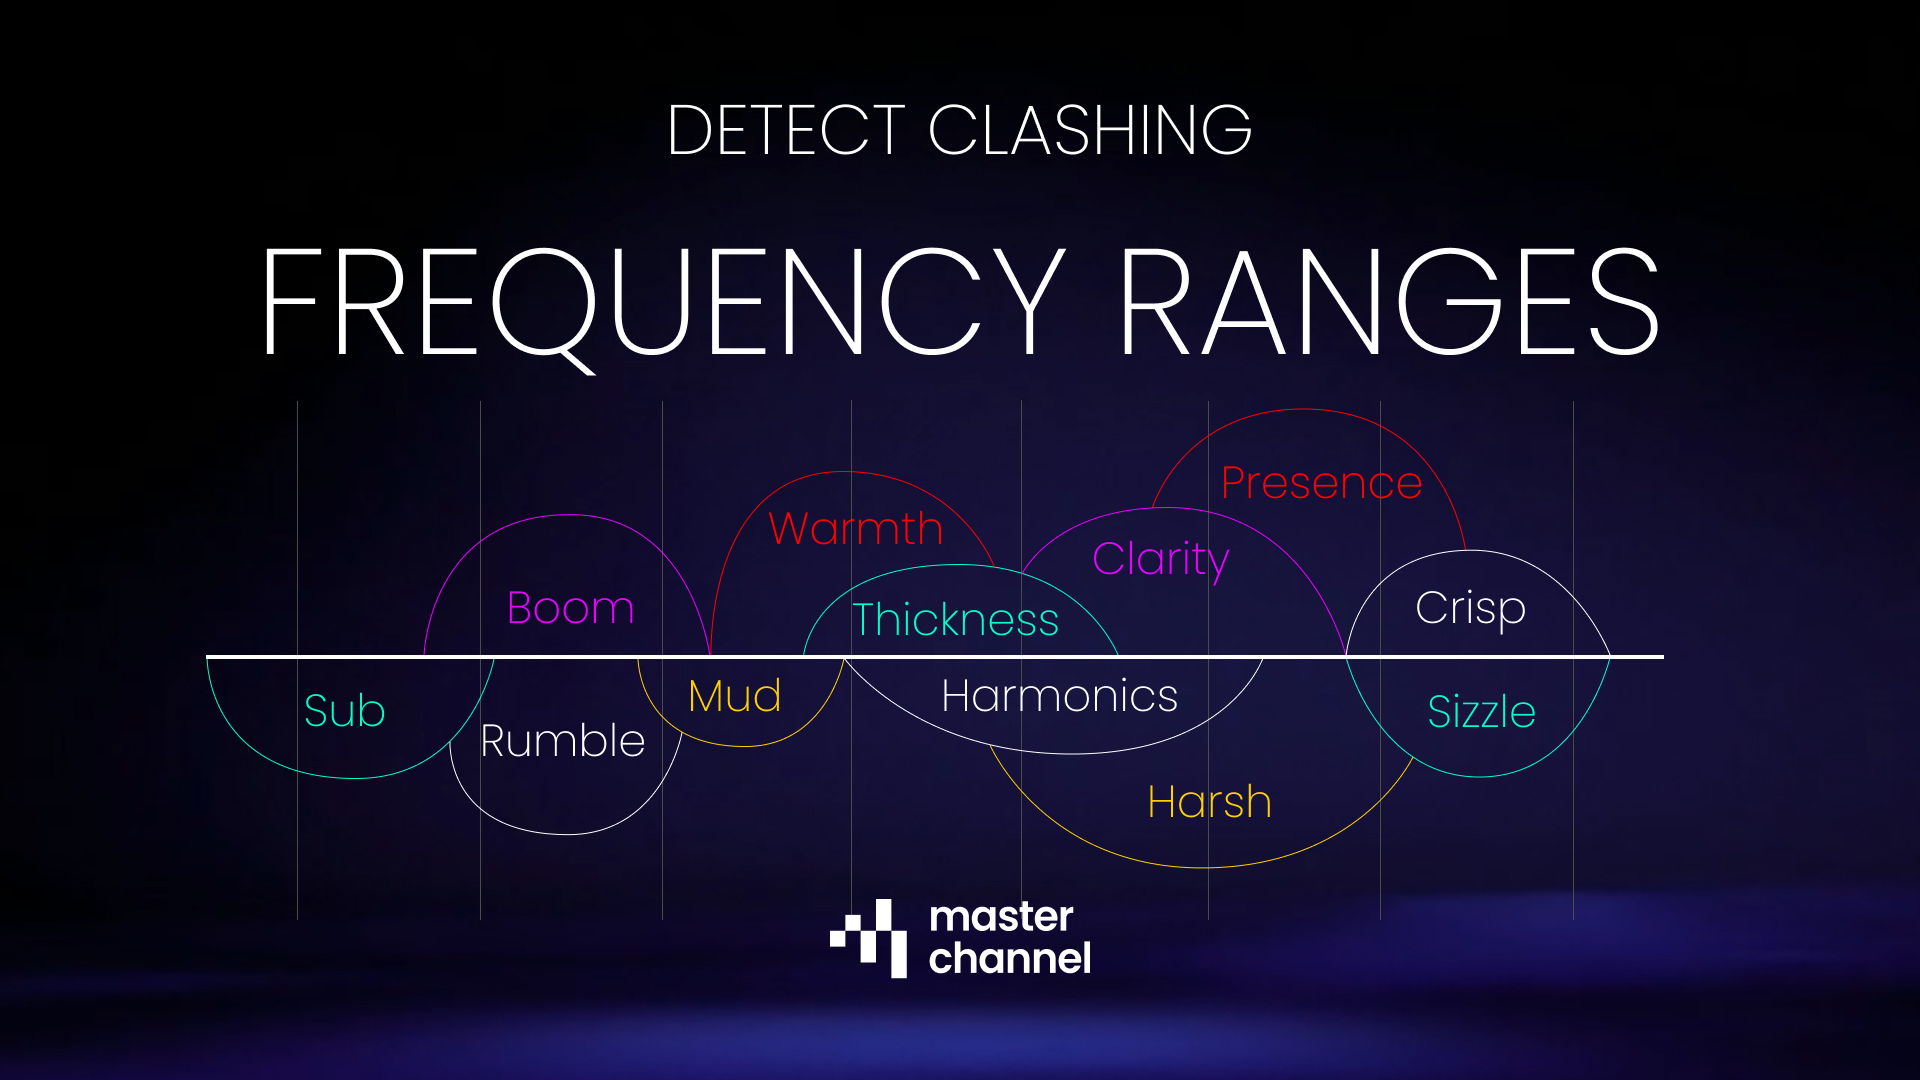
    If EQ is about carving out space, compression is about control. It’s the tool that glues a mix together, making sure the quiet parts are audible and the loud parts don’t jump out and scare the listener.

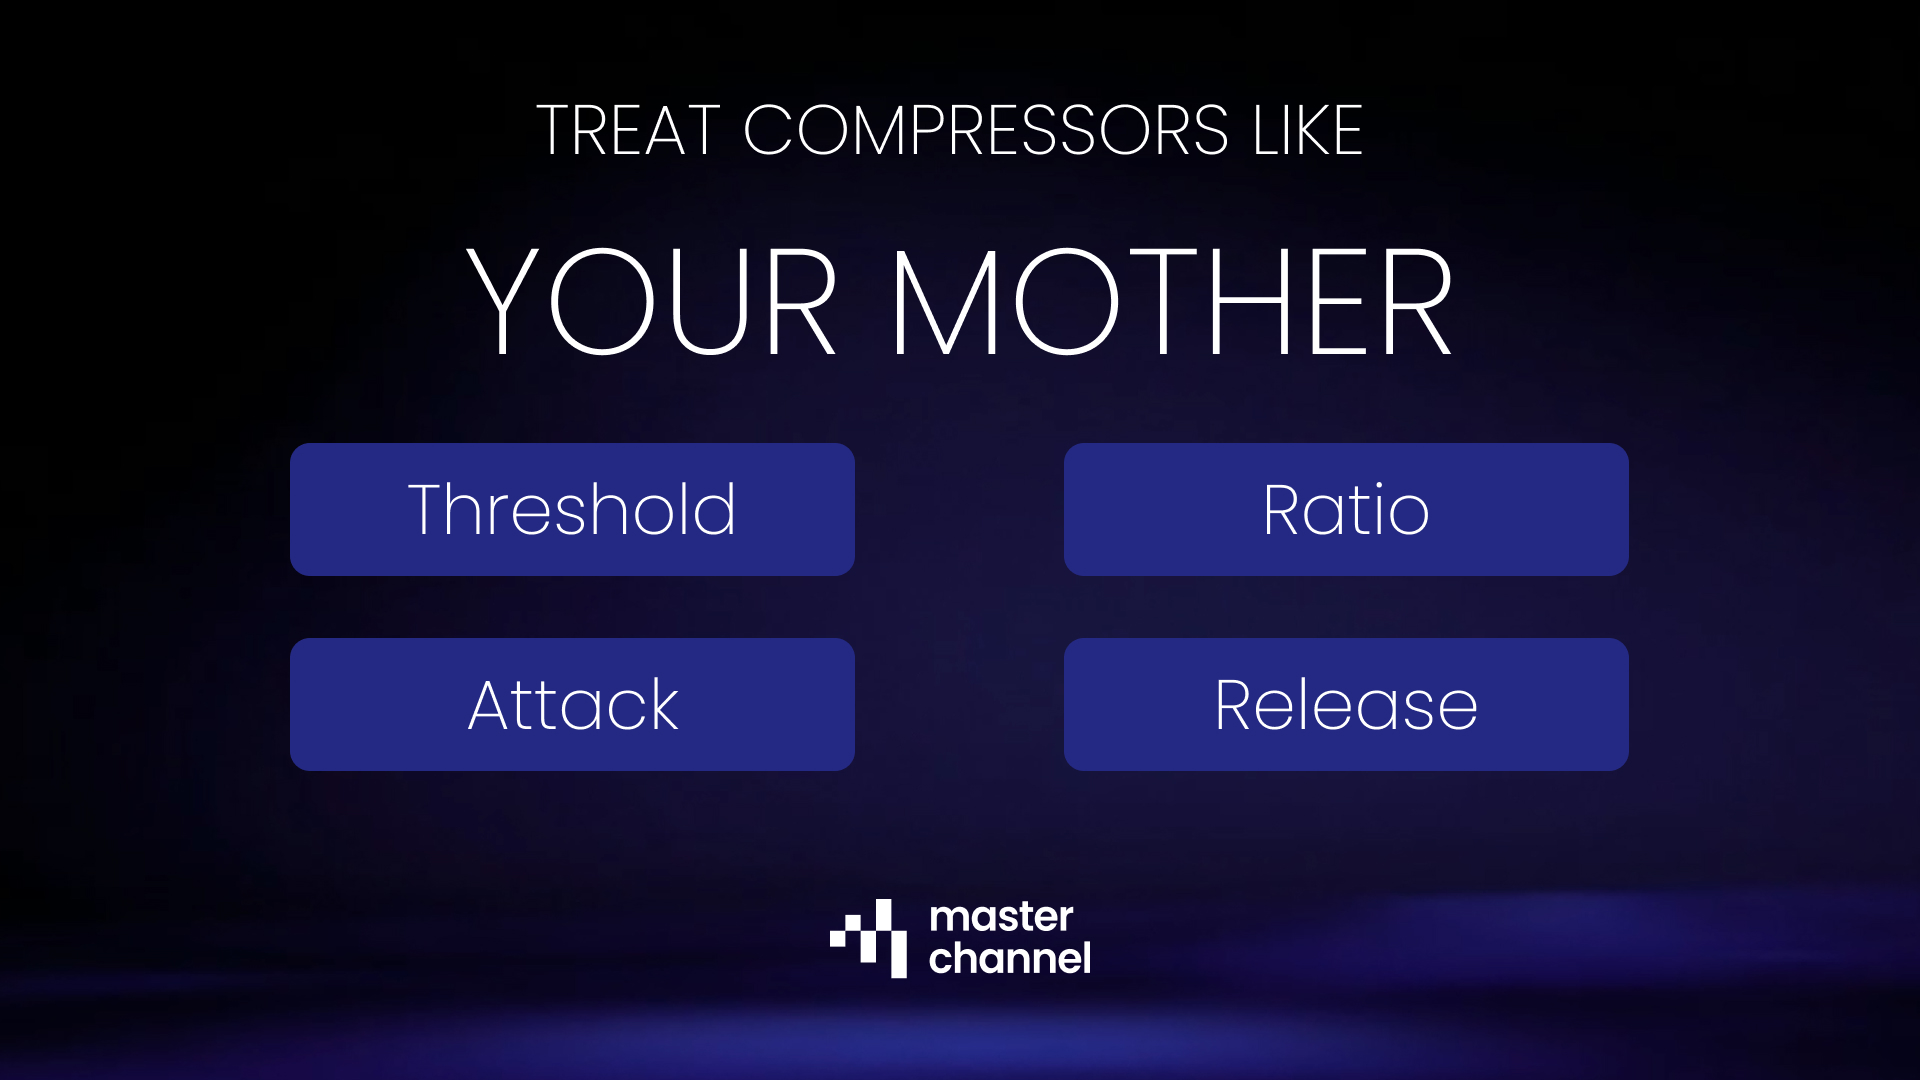
    But with all those knobs, Threshold, Ratio, Attack, Release, it’s easy to get overwhelmed. To make it simple, let’s compare a compressor with a relatable household scenario: Your Mother.

    • Threshold: The “Boundary” Line
      • The Analogy: This is the specific volume level she asks you to turn the music down to.
      • The Technical: The compressor does nothing until the audio signal crosses this level. Once the volume hits the threshold, the “policing” begins.

    • Ratio: The “Strictness” Factor
      • The Analogy: This is how much you actually turn the volume down after she shouts at you.
      • The Technical: Ratio determines the intensity of the volume reduction. A low ratio (2:1) is a gentle nudge; a high ratio (10:1 or higher) is like a brick wall that won’t let the volume go any further.

    • Attack: The “Reaction Time”
      • The Analogy: How fast you react after she shouts at you.
      • The Technical: This controls how quickly the compressor starts squashing the sound once it crosses the threshold. A fast attack kills the “punch” (transients), while a slow attack lets the initial hit through before clamping down.

    • Release: The “Recovery” Speed
      • The Analogy: How fast you turn the volume back up after she closes the door.
      • The Technical: This determines how long it takes for the compressor to stop working and let the volume return to normal. If it’s too fast, the audio might “pump” unnaturally; if it’s too slow, it might squash the next beat before it even happens.

    Without compression, your mix will feel “jumpy.” A vocal might be perfect in the verse but get buried in the chorus. By using these four controls, you ensure your track stays consistent, professional, and balanced, just like a well-behaved household.

    An infographic comparing audio compression settings to a mother's request, featuring sections on Threshold, Ratio, Attack, and Release, with humorous descriptions.

  • Music Production Tips: Detect Clashing Frequency Ranges

    Music Production Tips: Detect Clashing Frequency Ranges

    Have you ever finished a mix only to find it sounds “blurry”? You can hear the kick drum, but it feels soft; the vocals are there, but they lack sparkle. This is often caused by frequency clashing, when two or more instruments compete for the same real estate in the audio spectrum.

    To improve the sound, you need to treat your frequency range like a house: if you put too much furniture in one room, no one can move.

    Here is how to use the frequency map to declutter your mix.

    This is the “physical” part of the music. If you have a synth bass and a kick drum both sitting heavily in the Sub area, they will clash, creating a weak, flubby low end.

    • The Fix: Use a high-pass filter on everything that isn’t a kick or a primary bass. You don’t need 50Hz energy in your vocals or guitars.

    This is where most amateur mixes fail. Too much Boom makes a track feel heavy and slow, while too much Mud (250Hz–500Hz) makes it sound like it’s being played through a cardboard box.

    • The Fix: Be aggressive with EQ cuts in the “Mud” range for instruments that provide “Warmth” (like acoustic guitars or pianos) to let the snare and vocals breathe.

    This is the “meat” of the instrument. It’s where we find the Thickness of a snare or the Harmonics of a vocal. However, if this area is over-packed, the mix becomes Harsh and fatiguing to the ears.

    • The Fix: If the mix sounds “honky” or annoying, look for a buildup around 1kHz–2kHz. Slight cuts here can smooth out a digital-sounding track.

    This is where the “expensive” sound lives. Presence (3kHz–5kHz) helps a vocal sit on top of the mix, while Sizzle and Crisp highs (8kHz+) add air and excitement.

    • The Fix: Be careful! Too much “Sizzle” leads to sibilance (harsh ‘S’ sounds). Use a de-esser to keep the highs crisp without piercing the listener’s eardrums.

    Diagram illustrating frequency ranges and terms like 'Boom', 'Warmth', 'Clarity', and 'Crisp' to detect audio clashing.

    If you can’t tell which two instruments are clashing, try the Mute Test. Mute one instrument; if the other instrument suddenly sounds clearer and more defined, you’ve found your clash. Use the frequency ranges above to carve out space so both can coexist.

  • This Is How to Use the New Masterchannel Component!

    This Is How to Use the New Masterchannel Component!

    We at Masterchannel recently released our new Mastering Component, and so far, people are loving it!

    Compared to the previous version, we’ve upgraded the new service with some key features, essential for anyone creating and producing music.

    With the new component you can now:

    • See what audio resolution you uploaded, and what you get back. For more information, see our blog post on audio resolutions here.
    • Turn on/off Normalization, meaning you’ll get a more “Real” listening experience.
    • Jump back and fort more easily with the navigation buttons, AND loop the song so you can listen to the fine details in your track.
    • Analyze you track, based on LUFS-levels, Peak dBFS and EQ Balance.

    We hope you’ll like the new update. To test it on your own music, click the button down below:

  • Use this tool with FL Studio Web (Browser version)

    Use this tool with FL Studio Web (Browser version)

    FL Studio has officially launched its Web public beta, bringing its pattern-based workflow directly into your browser! This is a massive shift, offering instant access and seamless compatibility to start and finish tracks anywhere, on any computer.

    While FL Studio Web is perfect for production, every track needs mastering, the final, critical step for ensuring your music sounds loud, clear, and ready for streaming.

    This is where you need a specialized tool to finish strong.

    The most efficient modern workflow for producers on the go is to combine the flexibility of FL Studio Web with the professional polish of Masterchannel.

    1. Produce in FL Studio Web: Create and mix your track in the browser-based DAW.

    1. Export and Upload: Export your mix from FL Studio.

    1. Upload to Masterchannel: The AI mastering engine instantly analyzes your track, delivering a professional and ready master optimized for all streaming platforms.

    This combination gives you the world-class creative tools of FL Studio and a consistently high-quality final master, all without the need for complex engineering knowledge.

    Learn more by clicking the button below

  • Two Years, 200,000 Masters: Celebrating the Success of Wez Clarke AI

    Two Years, 200,000 Masters: Celebrating the Success of Wez Clarke AI

    Two years ago, the music world shifted. We at Masterchannel launched Wez Clarke AI, the world’s first AI clone of a GRAMMY-winning engineer, and today we are thrilled to celebrate this groundbreaking service’s second anniversary!

    When we pioneered this collaboration with the legendary Wez Clarke, our goal was to democratize his signature “chart-breaking touch. For those who don’t know the legacy of Wez Clarke, he’s done a lot:

    • 1 Grammy Award and 2 Grammy Nominations.
    • 13 UK Number 1 hits.
    • 27 billion streams.
    • Engineered songs for artists like Avicii, Sam Smith, Clean Bandit, MK, Becky Hill and many more.

    Now, two years on, the results speak for themselves.

    Wez Clarke AI was designed to infuse every track with the clarity, depth, and competitive edge that defines Wez’s sound, ensuring masters are perfectly Streaming Optimized and sound incredible on every Speaker System. This commitment to world-class quality has fueled phenomenal growth.

    We are incredibly proud to announce that, in just two years, close to 200,000 songs have been mastered and optimized using Wez Clarke AI.

    What’s even more staggering is the recent acceleration of this success: a massive 10% of that total volume came in November alone! This incredible surge is a testament to how producers and artists around the globe are embracing AI not as a replacement, but as a powerful, professional tool to meet the highest engineering standards.

    As Wez Clarke himself puts it:

    “AI is transforming music production, and with this collaboration I am ensuring it is up to my high engineering standards.”

    Thank you to every producer who has trusted Wez Clarke AI with their music. Here’s to transforming the next 200,000 tracks and many more years of industry-leading AI mastering!


    Ready to give your music the competitive edge of a GRAMMY-winning engineer? Try Wez Clarke AI for free today.

  • How to create amazing DJ sets for YouTube!

    How to create amazing DJ sets for YouTube!

    This year, we at Masterchannel have recorded three DJ sets, each in it’s unique location highlighting the beauty of Norways landscapes. But creating this video can be done by any DJs, so today we’re breaking down how we did it!

    Preparing the music

    1. The first thing we did was creating a Spotify playlist with songs we thought could fit the vibe we wanted. In the playlist we aimed for 40-50 different songs.
    2. The second thing we did was to download the songs. Here you can use services like Beatport, Traxsource or other pay-per-song platforms. You can also search for free downloads on SoundCloud or YouTube as their are plenty of artists releasing their music for free, through downloadgates.
    3. After downloading the songs, we used Rekordbox to sort the songs, find the BPM and key and see what songs that transitioned well together. Here, we aimed for DJ sets that lasted between 30 and 40 minutes which typically ends up as a set with 9 to 12 songs.

    Finding the location

    1. After we had our DJ set, it was time to find a proper location to film at. We aimed for places where few people would show up, and in 2 out of 3 sets we recorded it as a sunrise set for that specific reason. Here, we used Google Maps to find locations that checked out certain criterias:
      • It should be located so we actually got the sunset / sunrise. If you record a sunrise DJ-set, you need to film to the east. If you record a sunset DJ-Set you need to film to the west.

    Recording the DJ set – Filming

    1. After finding a location and having the DJ set prepared, it’s time to film it. We had multiple cameras in our shots, as it creates a better vibe when you can switch between different angles.
      • You can e.g. use a Go-Pro or a phone to film yourself from straight forward.
      • You can use a phone or a more wide angle camera to film the DJ and landscape.
      • You can bring a friend to film some hand-held shots as this creates a more dynamic vibe.
      • If you have a drone, that’s an extra plus for those hovering landscape videos.

    Recording the DJ set – Music

    1. In our DJ sets, we used a pioneer mixer which is fairly easy to record with. It can be wise to bring two USB sticks so you have one you play music from and one dedicated to recording.
    2. Click record before you start the play you first song and then play throught the whole set. The DJ set will then be recorded on your USB stick, and can be exported to your computer afterwards.

    Post-production

    1. After you have recorded your DJ set, make sure that you upload it to a service like Masterchannel so it can be fully mastered. That way it will sound much better on YouTube.

    1. To edit the videos, use a software like CapCut. Here, you’ll drag & drop in your video files, the Masterchannel mastered DJ set, and then you can start edit in the way you like.

    We hope this is helpful and here’s our DJ sets for inspiration:

  • A Quick Guide to Getting Your Music on Spotify

    A Quick Guide to Getting Your Music on Spotify

    Spotify is the world’s largest music streaming platform, and a presence there is essential for any artist. However, unlike some platforms, you cannot upload your music directly to Spotify.

    To get your music on Spotify, you must use a digital music distributor. This guide covers the preparation, the technical specs Spotify requires, and how to get your track ready for a professional release.

    Getting on Spotify means uploading to a distributor first. Here is the general process.

    1. Choose Your Distributor You need a service to act as the “middle-man.” These companies send your music to Spotify (and hundreds of other stores) and collect your royalties. Popular choices include:

    • TuneCore
    • amuse
    • Symphonic
    • Ditto Music
    • Horus Music

    2. Get Your Assets Ready Before you log in to your distributor, have these three things:

    • Your Final Mastered Audio File: A high-quality WAV file.
    • Your Square Album Artwork: A 3000×3000 pixel JPG or PNG.
    • Your Metadata: All your song credits (title, artist, songwriters, etc.).

    3. Upload to Your Distributor Log in to your chosen distributor and create a new release. You will upload your audio, artwork, and fill in all the metadata here.

    4. Set a Future Release Date This is the most critical step for Spotify. Set your release date at least 2-4 weeks in the future. This does two things:

    • It gives the distributor time to process and deliver your song to Spotify.
    • It gives you time to pitch your song to Spotify’s editorial playlists.

    Your distributor will enforce these rules because Spotify requires them. If your files don’t meet these specs, they will be rejected.

    Audio Requirements:

    • Format: WAV (lossless).
    • Sample Rate: 44.1 kHz
    • Bit Depth: 16-bit or 24-bit.

    Artwork Requirements:

    • Proportion: Exactly Square (1:1)
    • Size: 3000 x 3000 pixels (Recommended standard)
    • Format: JPG or PNG

    Mastering is the final, critical step before distribution. It ensures your song sounds polished and competitive, which is especially important on a platform like Spotify.

    Here’s how Masterchannel optimizes your music for a global release via your distributor:

    • Tailored for Streaming: Masterchannel’s AI-powered mastering is specifically designed with streaming platforms in mind. It optimizes your track’s loudness to the standards of services like Spotify, ensuring your song sounds consistently great everywhere.

    • Preserving Quality, Enhancing Power: You can upload your high-resolution audio file (e.g., 24-bit, 44.1kHz WAV) to Masterchannel and receive a professionally mastered file back with the same specifications.

    • Unleash Your Sonic Potential: The mastering process isn’t just about volume. Masterchannel analyzes and enhances the entire frequency spectrum, improves stereo width, and manages the dynamic range to make your music feel more alive and engaging for the listener.

    • Confidence in Your Release: By mastering with Masterchannel, you can be confident that the file you’re delivering to your distributor is the best it can possibly be. This professional touch ensures your music stands shoulder-to-shoulder with major label releases, giving your artistic vision the high-quality sound it deserves on the world’s biggest streaming platform.

    Before you upload to your distributor, give your music the professional polish it needs to stand out on Spotify.

  • Uploading Your Music to LANDR – What To Know

    Uploading Your Music to LANDR – What To Know

    LANDR offers a robust music distribution service to get your tracks on Spotify, Apple Music, and over 150 other platforms. A successful release, however, depends on a perfect upload.

    This guide covers the essential steps for LANDR’s distribution process, the technical specs you must follow, and how to prepare your track for a professional release.

    1. Get Your Assets Ready Before you start, have these three things:

    • Your Final Mastered Audio File: LANDR prefers high-quality WAV, FLAC, or AIFF files.
    • Your Square Album Artwork: Must be high-resolution (3000×3000 pixels is recommended).
    • All Your Metadata: This includes your artist name, song title(s), release date, genres, and all collaborator/songwriter credits.

    2. Create Your Release

    • Basic Info: Enter your Release Title, Artist Name(s), and Label Name.
    • Artwork: Upload your prepared artwork file. LANDR’s uploader will check if it meets the specifications.
    • Add Tracks: Upload your mastered audio files.
    • Edit Track Info: For each track, you must enter the title, genre, language, and detailed songwriter/contributor credits. This is crucial for royalty payments. LANDR will automatically assign an ISRC code if you don’t provide one.
    • Choose Stores: Select the platforms and territories where you want your music to be available.
    • Set Release Date: It is highly recommended to set your release date at least 2-4 weeks in the future. This provides a buffer for store approval and, most importantly, allows you to pitch your song to editorial playlists (like on Spotify for Artists).
    • Review & Submit: Double-check every single detail—artist names, track titles, and artwork before submitting.

    Audio Requirements

    • Format: WAV, FLAC, or AIFF (Lossless formats are strongly preferred over MP3).
    • Sample Rate: 44.1 kHz
    • Bit Depth: 16-bit or 24-bit.

    Artwork Requirements

    • Proportion: Exactly Square (1:1).
    • Size: 3000 x 3000 pixels (recommended).
    • Format: JPG or PNG.

    Mastering is the final, critical step before distribution. Using Masterchannel ensures your music sounds professional and competitive.

    Here’s how Masterchannel optimizes your music for a global release via LANDR:

    • Tailored for Streaming: Masterchannel’s AI-powered mastering is specifically designed with streaming platforms in mind. It optimizes your track’s loudness to the standards of services like Spotify and Apple Music, ensuring your song sounds consistently great everywhere without triggering their loudness normalization penalties.

    • Preserving Quality, Enhancing Power: You can upload your high-resolution audio file (e.g., 24-bit, 44.1kHz WAV) to Masterchannel and receive a professionally mastered file back with the same specifications.

    • Unleash Your Sonic Potential: The mastering process isn’t just about volume. Masterchannel analyzes and enhances the entire frequency spectrum, improves stereo width, and manages the dynamic range to make your music feel more alive and engaging for the listener.

    • Confidence in Your Release: By mastering with Masterchannel, you can be confident that the file you’re delivering to LANDR is the best it can possibly be. This professional touch ensures your music stands shoulder-to-shoulder with major label releases, giving your artistic vision the high-quality sound it deserves.

    Before you hit “Submit” on your next LANDR release, give your music the professional polish it needs.

  • Uploading Your Music to Too Lost – What To Know

    Uploading Your Music to Too Lost – What To Know

    Too Lost offers independent artists a direct and powerful route to over 450 streaming services, but a successful release starts with a flawless upload.

    This guide covers the essential steps for Too Lost’s upload process, the technical specs you need, and how to prepare your track for a professional release.

    1. Get Your Assets Ready Before you start, have these three things:

    • Your final mastered audio file (WAV or FLAC).
    • Your square album artwork (3000×3000 pixels).
    • All your metadata (artist name, song title, release date, and songwriter credits).

    2. Create Your Release

    • Basic Info: Enter your Release Title, Type (Single/EP/Album), and Primary Artist(s).
    • Artwork: Upload your 3000×3000 pixel artwork.
    • Release Date: Set this at least 2-4 weeks in the future to allow time for playlist pitching.
    • Details: Add your Genre, Language.
    • Stores & Extras: Your music goes to all 450+ partners by default. Be sure to select extras like YouTube Content ID and Facebook/Instagram delivery.
    • Audio & Splits: Upload your audio file. This is where you can also add collaborators and set royalty splits.
    • Review & Publish: Double-check all your information and submit.

    • Format: WAV (highly recommended).
    • Sample Rate: 44.1 kHz
    • Bit Depth: 24-bit or 16-bit.

    Artwork Requirements

    • Proportion: Square
    • Size: 3000 x 3000 pixels (minimum)
    • Format: JPG or PNG

    Mastering is the final, critical step before distribution. Using Masterchannel before you upload to Too Lost ensures your music sounds professional and competitive.

    Here’s how Masterchannel optimizes your music for a global release via Too Lost:

    • Tailored for Streaming: Masterchannel’s AI-powered mastering is specifically designed with streaming platforms in mind. It optimizes your track’s loudness to the standards of services like Spotify and Apple Music, ensuring your song sounds consistently great everywhere without triggering their loudness normalization penalties.

    • Preserving Quality, Enhancing Power: You can upload your high-resolution audio file (e.g., 24-bit, 44.1kHz WAV) to Masterchannel and receive a professionally mastered file back with the same specifications. For instance, if you provide a 24-bit file, Masterchannel will deliver a mastered 24-bit file, allowing you to upload the highest possible quality to Too Lost. This process enhances the clarity, punch, and overall impact of your track while preserving its technical integrity.

    • Unleash Your Sonic Potential: The mastering process isn’t just about volume. Masterchannel analyzes and enhances the entire frequency spectrum, improves stereo width, and manages the dynamic range to make your music feel more alive and engaging for the listener.

    • Confidence in Your Release: By mastering with Masterchannel, you can be confident that the file you’re delivering to Too Lost is the best it can possibly be. This professional touch ensures your music stands shoulder-to-shoulder with major label releases, giving your artistic vision the high-quality sound it deserves.

    Before you hit “Publish,” give your music the professional polish it needs.

  • Update on Audio File Exports from Masterchannel

    Update on Audio File Exports from Masterchannel

    We’ve rolled out a new update to standardize and improve our file processing. Here’s the main takeaway: all processed files are now returned as a Lossless WAV file.

    We made this change to provide a consistent, high-quality, and professional-grade format for all users. Here’s a quick breakdown of how the resolution of your new WAV file is determined.

    Our system is designed to give you the best possible quality by matching your original file’s specifications. The final sample rate and bit depth of your WAV file will depend on the properties of the file you upload.


    We check your input file’s sample rate to decide the output rate.

    • If your input is a standard rate (44.1, 48, 88.2, 96, 172.4, or 192 kHz), your output WAV will have the exact same sample rate.
    • If your input is any other rate, the output WAV will default to 44.1 kHz.

    The output bit depth depends on your original file type:

    • For Lossless Files (e.g., WAV, AIFF, FLAC): The bit depth will match your original file (e.g., 16-bit, 24-bit, or 32-bit).
    • For Lossy Files (e.g., MP3, M4A, OGG): The output bit depth will always be 24-bit.


    So, what happens if you upload a typical MP3?

    1. An MP3 is a lossy file, so the output bit depth automatically becomes 24-bit.
    2. The sample rate of your MP3 file will be matched if it’s 44.1, 48, 88.2, 96, 172.4 or 192 kHz, otherwise it defaults to 44.1 kHz.

    This means most lossy files will result in a 44.1 kHz / 24-bit WAV file, ensuring you always get a high-quality, standard-format output, which is ideal for distribution. If you want your song to be converted back to MP3, we recommend converting it using a third party software like Cloudconvert.

    This approach will provide you with the best balance of quality and consistency for your songs.